
Before and after: The Guest Suite
I wanted to share photos of the before and after of the Guest Suite. To say that I busted my butt to get this project done is a serious understatement. I am truly, incredibly proud of myself, and I just have to say that out loud.
Maybe you can see best thing from these photos – an intangible thing – a HUGE, HUGE sense of relief. Four and a half years ago, I bought the house and was scared of so many things – of screwing it up, of making it worse, of maybe killing myself in the process (haha), and possibly not being able to do it. Now I can say that I did it, and I’m better for it. And MAN, does it feel good for it to be complete!
Entrance
This before picture was taken 10 days after I bought the house and 4 hot water pipes burst and collapsed the basement ceiling. Not even joking. It was January, it was 10 degrees outside, and I genuinely had NO idea what I had gotten into. I cried myself to sleep.
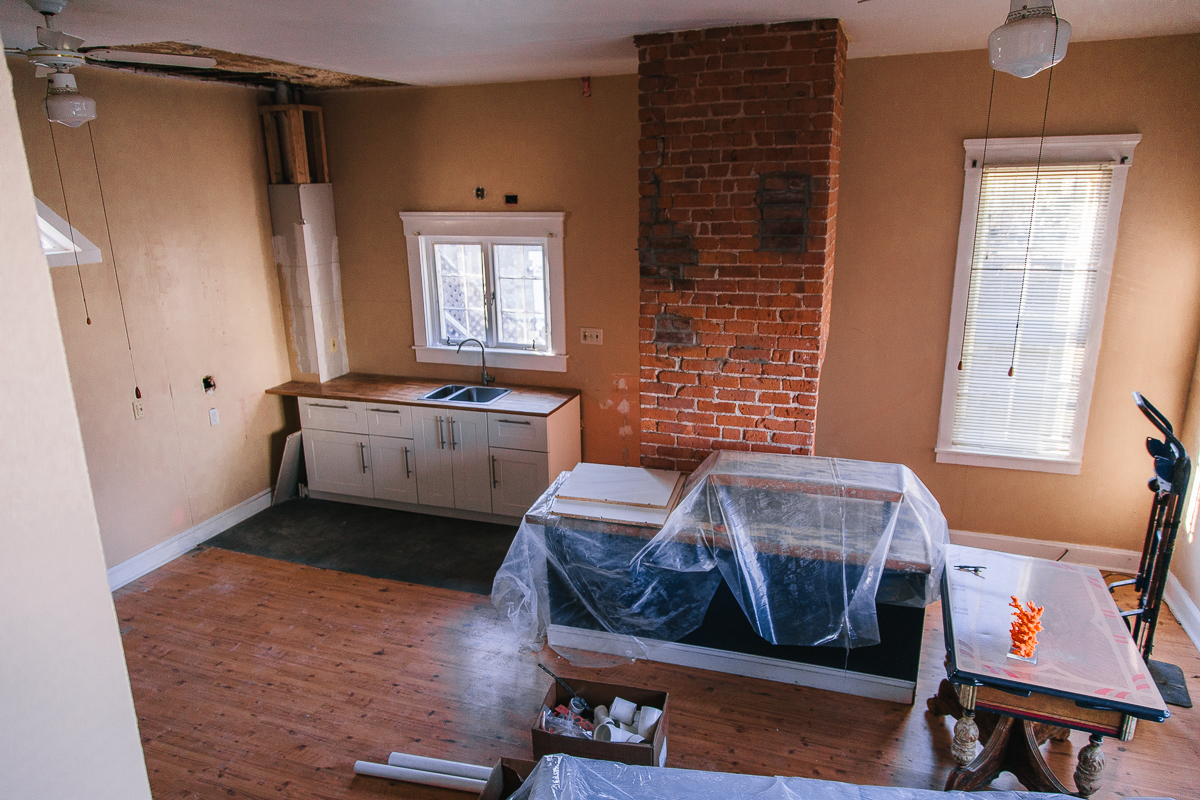
This area of the house was weird. Truly strange. You can see the painted terrace fencing that surrounded a sink and bathroom over on the left. The bathroom had a concrete floor, with terrible 80’s flagstone. I tore every last bit out.
As you walk in now, you are met an open, airy feel. This is the first floor living space of the Guest Suite. A small kitchenette is where the horrible terraced bathroom was. It has a butcher block countertop, a cute blue mini fridge and matching microwave (no stove!). I installed open shelving with wooden brackets from Architectural Depot that look similar to the lentils on the exterior of the house. The dining nook is over to the right, and a comfy sitting area. The wallpaper is my most favorite part of this space. It’s called Melville by Cole & Son, based on the story of Moby Dick (hello! perfect!) I partnered with Wallpaper Direct (see my post about that here) for that design project and I love how it turned out. The whole space is bright and draws you in. A nice contrast to the before.

Before
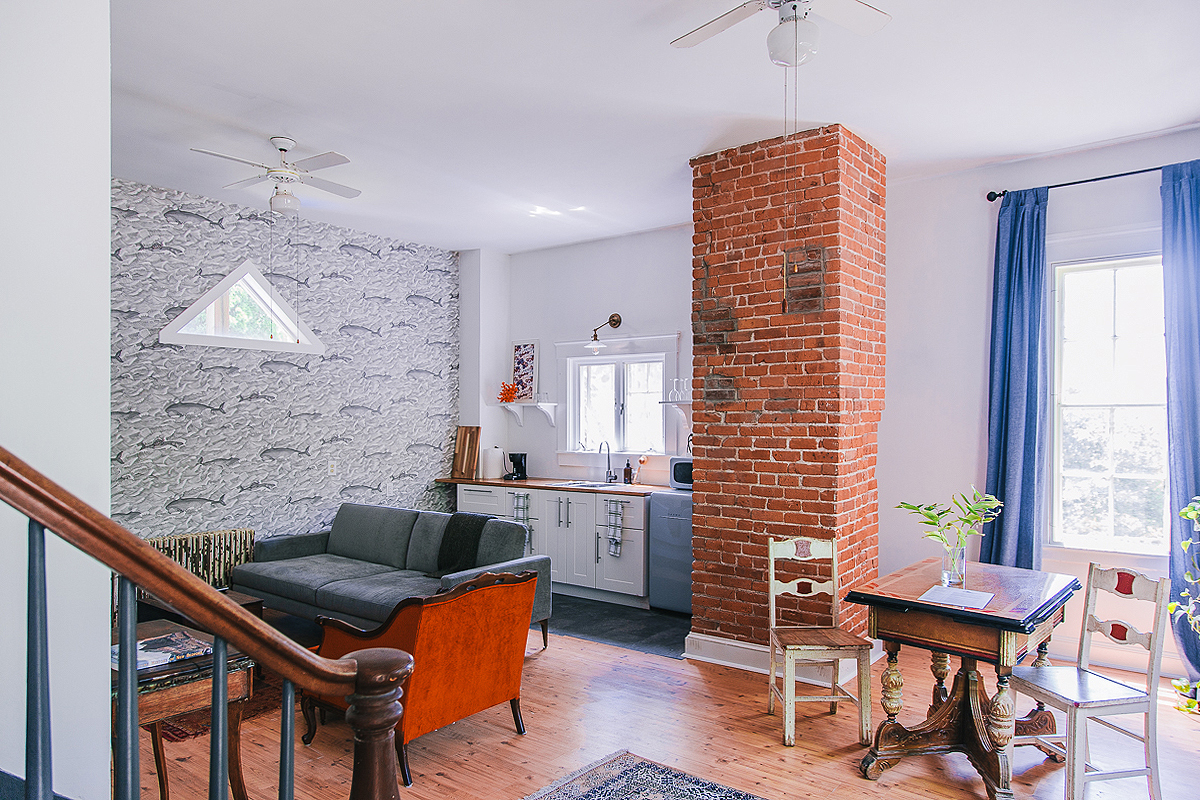
After
In the before picture below, you can see the doors that connected to the other side of the house. Those were filled in and removed. Now there is a sliding barn door, which goes to the basement. The sliding door came from the downstairs, and I stripped off most of the paint. I got a sliding door set from Amazon. It took almost an entire day figuring how how to attach it securely to the wall, but I did it!
This space feels nice and big now that there is a bit more simplicity. I installed a new entrance light from Olde Brick Lighting, with a painted ceiling medallion from Architectural Depot. The hanging gallery wall has floating glass frames with antique postcards from New Bedford. I got the postcards from a kind neighbor and the frames from World Market. I made clear photo corners out of tape so that the postcards would stay put (being careful to not get any of the sticky side of the tape on the postcards themselves). I love the floating frames because you can flip them over and read the entire card – seeing what people were up to in the 1900s is so fun!

Before

After
The before photo below is mid-construction. I had another light in the entry way which I switched out, and you can see how I redid all the baseboard trim. I love looking at this space from this angle because you can see how stark the contrast is.

Before

After
Dining Nook
I had to redo the almost the entire ceiling on the first floor because I had all the plumbing redone on the second floor. Not an easy feat (and shout out to JSP Plumbing for doing an incredible job! The amount of dust was insane – I cleaned dust for days.. weeks even! Now it’s all gone and this dining nook looks clean and cozy enough for a sunny cup of morning coffee.

Before

After
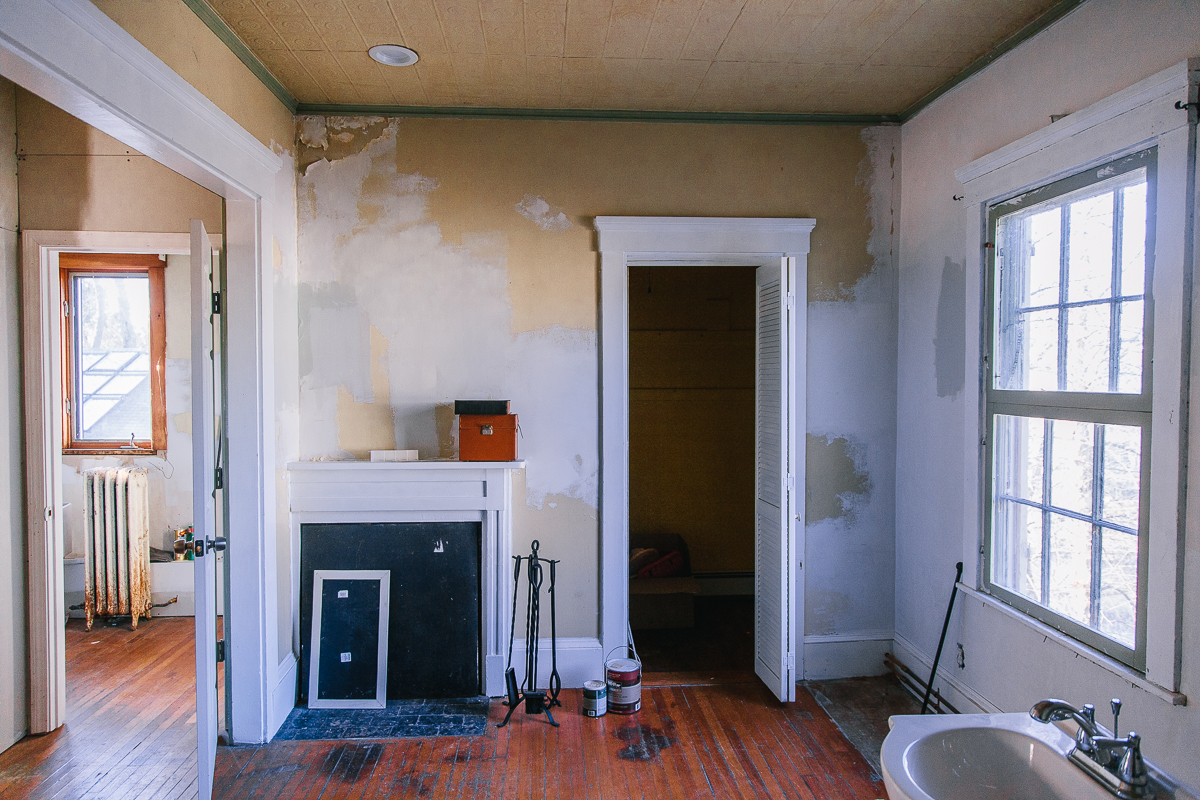
Bedroom
When I bought the house, you could walk up the servants staircase and be brought to this horrible, smelly, gross kitchen. It was moldy and reeked of cat pee. It was horrendous! I have no idea how I said to myself “yeah sure! I’ll buy this and fix it up! Won’t that be fun!” Haha. But I did, and I did!
I tore every part of the old kitchen out (note the first photo that has wires and pipes everywhere.. like what is that?) All of the electrical and plumbing was redone. I insulated the walls and turned this space into a serene, relaxing bedroom.


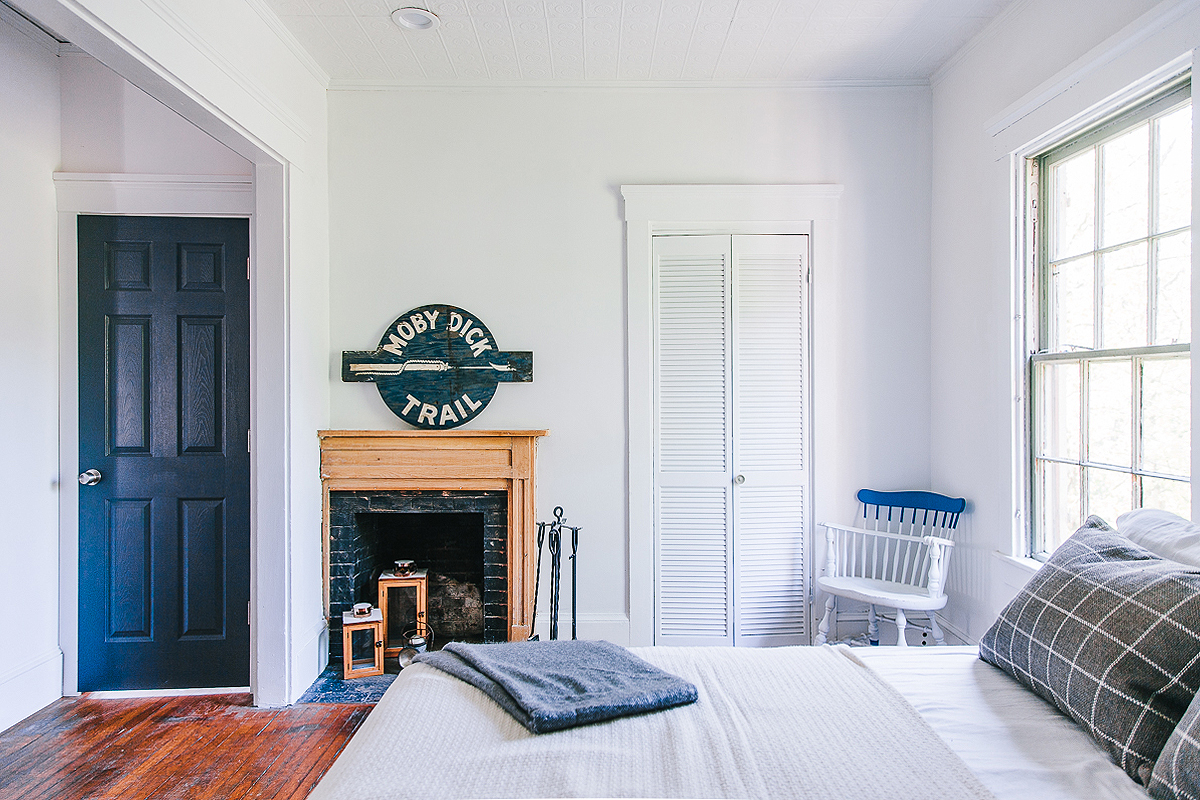
Wood fireplace
The house has 7 fireplaces, all of which are made of marble, except for this one. It had about 20 layers of paint on it, and I asked my friend, Chuck Hauck, to see if he could restore it. He did an amazing job, the wood is now exposed (after 164 years!) and it feels so lovely against the stark white background. To me, this fireplace is almost singing. It makes me so happy!
Before
After
Reading area
It’s the little things that make such a big difference in an old home (or any home for that matter!) I had my contractor, Nuno of Next Level Painting, remake the door, baseboard and ceiling trim mouldings so it would match the rest of the house.
I need to do a few things to this reading area. I need the perfect chair and I need to fix this light (disregard the bungee cords, haha!) One thing at a time, or in my case, 100 things at a time.


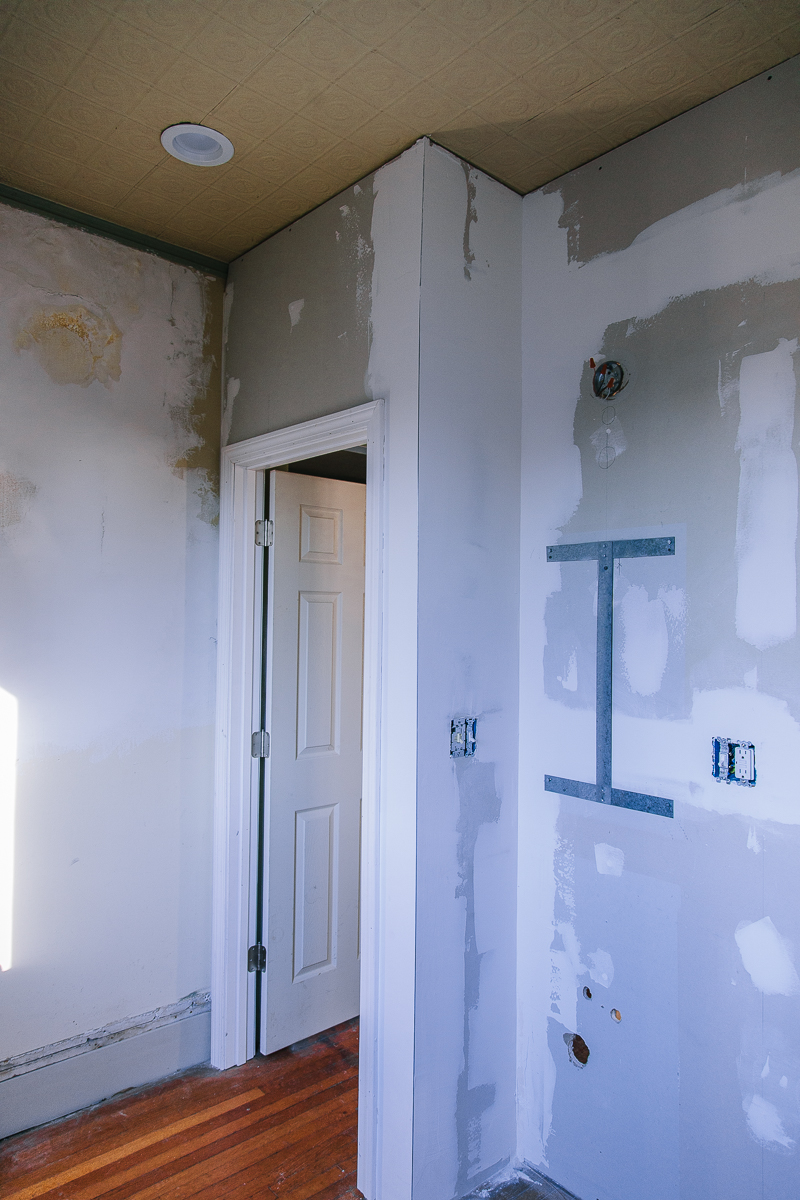
Bathroom
This bathroom, as all bathroom remodels go, was intense. Every last bit of the plumbing that had been installed originally was wrong. All of it was torn out and brought up to code. The walls were replaced with cement board so it was ready for tile and all the electrical and heating was redone. You can see in the second set of bathroom pictures below the amount of water damage from chimney leaks. That was all redone as well.
The vanity light is from Olde Brick Lighting, and the mirror I found on Craigslist. I would still like to find a better vanity and I need to have the floor redone. Those two things are for phase 2!

Before
Before

After

After
I did it!
All in all, a VERY successful renovation. Blood, sweat and tears went into this project, and I can say for certain that it was worth all the elbow grease. This space is now being enjoyed by guests via Airbnb who have been renting it to explore the area. The feedback has been really positive and I’m so glad I can be part of a visitor’s New Bedford experience.
And now, I’ll move on to another project. Because in the world of old home restorations, the projects never end!
Before

After